In the previous post, I explained a simple circuit that will indicate if a MIDI OUT port can provide 5 Volts and a little bit of current between pin 2 (ground) and pin 4 (+5 Volts). Not all MIDI devices are wired that way. Some leave pin 2 disconnected (bad) while others connect it to chassis ground (often the same as circuit ground) and a few use a micro-controller pin as a false ground (!?).
What if 5 Volts is available?
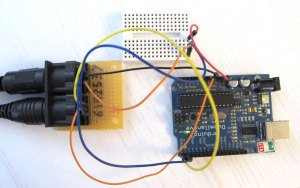
Here’s an old Arduino Duemilanove hookup to to my Akai MPK261:
If you have sharp eyes, you will see the power LED lit right beside the Arduino word.
PLEASE NOTE: Be careful if you want to test this with your own equipment. You can burn the equipment that provides the MIDI OUT power and/or the Arduino.
PLEASE NOTE: You can connect your Arduino to your computer using the USB port to download the sketches but DISCONNECT it from the USB port before you attach the other wires, to and from the MIDI connectors. It either connected to USB or to the equipment providing the MIDI power.
You can try connecting an Arduino Uno this way: From the MIDI OUT connector of your equipment, pin 2 goes to Arduino ground (gnd) and pin 4 goes to +5 Volts (5v). The “power” LED should light up, but maybe dimly. If this works, connect pin 5 to Arduino digital pin 0 (RX). You can run this simple sketch:
It will blink the Arduino LED (pin 13) every time a Note On Midi message is received. If you send a Program Change message, it will blink the LED a number of times according to the program number.
An Arduino Uno will draw less than 10 mA from the MIDI OUT port. You can’t use that little power to light up a bunch of LEDs or run a servo. In fact, you might not have enough power to run anything… except the MIDI OUT port of that Arduino.
With the Arduino hooked up this way and the sketch provided above, you should have all incoming MIDI traffic replicated on the MIDI OUT port and note 42 playing for one second and the LED (pin 13) flashing for one second. That should be enough to test your connections.
So you could use the sketch to filter/modify midi messages coming out of a MIDI source.


Leave a Reply